Custom Azure Storage
Connect Azure Storage to your Fouita Whitelabel
This guide walk you through the steps necessary to setup Azure storage into your Fouita Whitelabel.
First, you need to visit your Whitelabel Space, and click on "Settings".
Under the Storage section, select "Micsoft Azure"
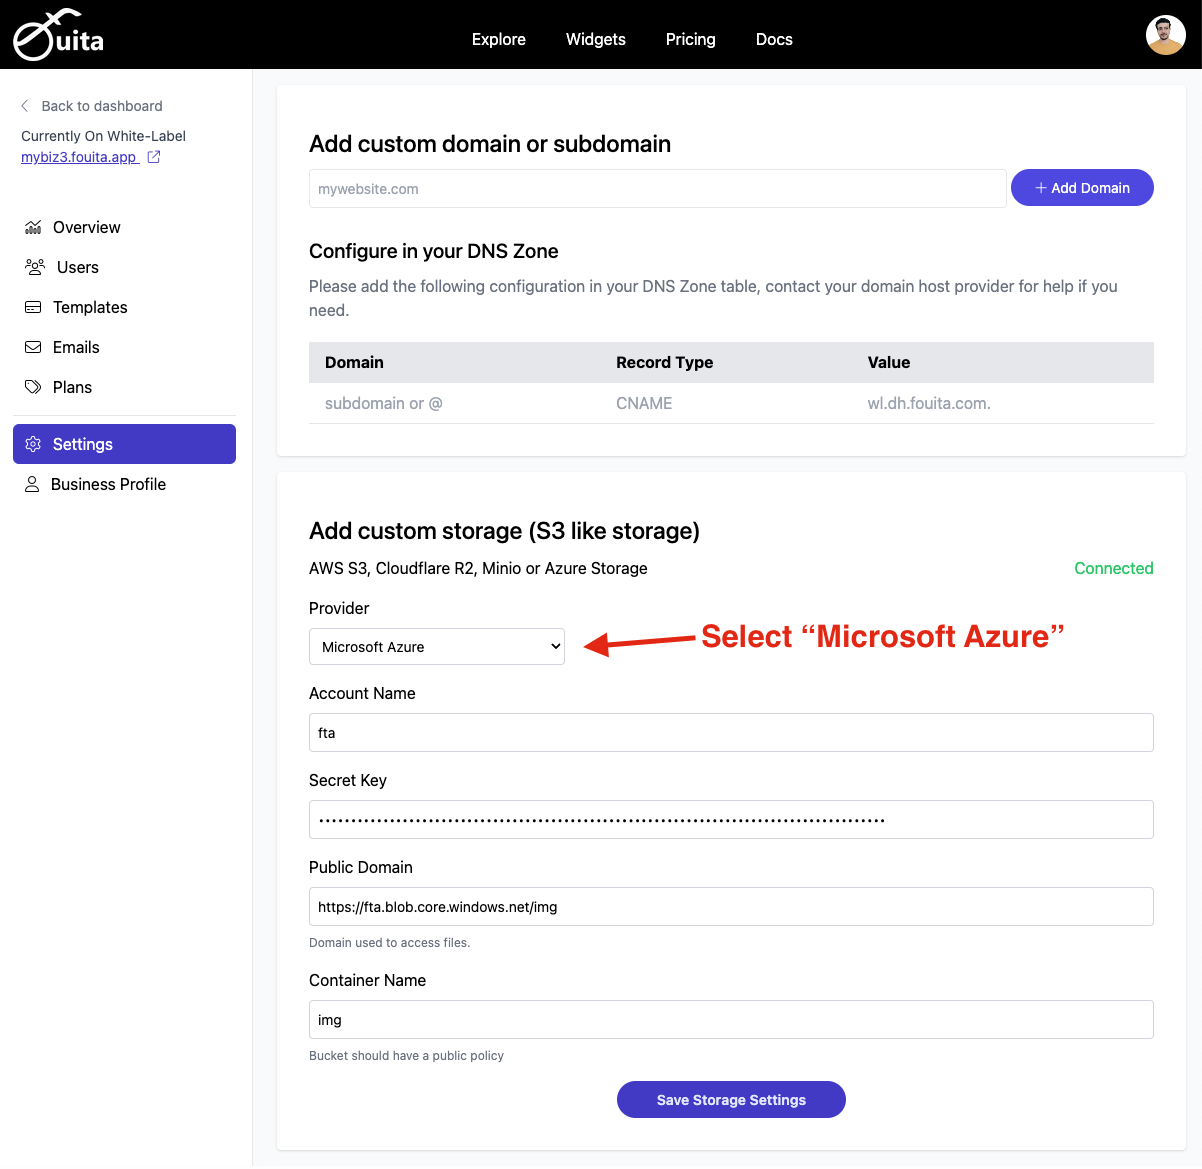
Required Configuration
Before connecting your account, make sure that you have anonymous access enabled.
To do that, under your storage account, you need to visit "Settings" > "Configuration" > "Allow Blob anonymous access" and check "Enabled"
When connecting the storage you will need to get the following details from your Azure account:
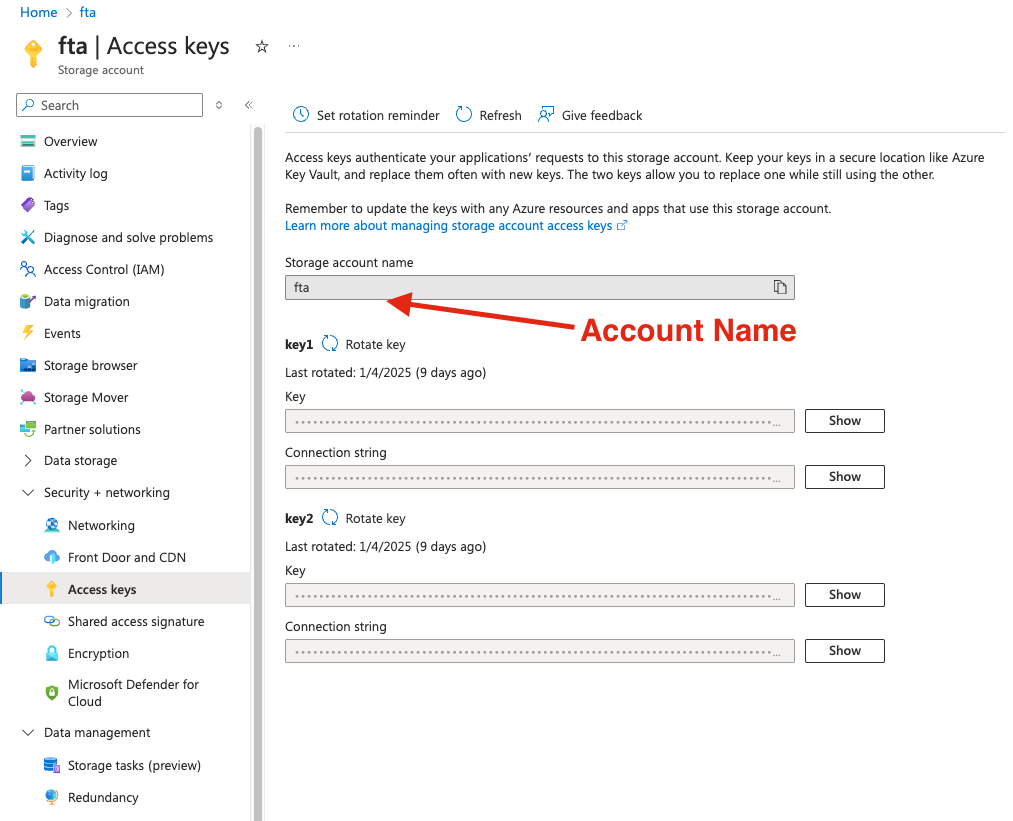
1 . Get Account Name
The "Account Name" is excactly your Storage account, when visiting portal.azure.com then selecting your storage account, you will find the name at the top left.
You can also find it under "Security + networking" > "Access keys"
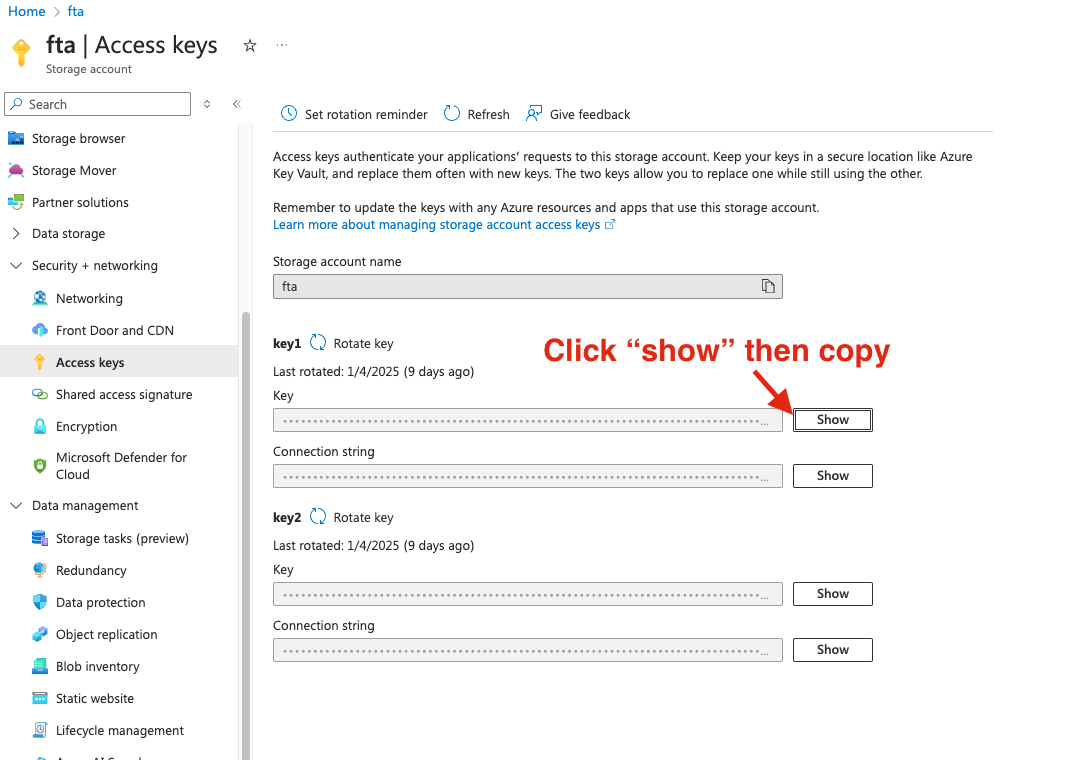
2. Get Access Key
The Access key is simply the "key" under the same page on step, click on "show" then click on the copy icon.
3. Get Public Domain (optional)
Public domain is the link used to access your files after the upload. it could be a default link provided by azure storage, https://<account-name>.blob.core.windows.net
Or it could be a custom domain associated with account, learn more on how to connect custom domain to azure storage using CDN
You can leave this option empty if you like Fouita to retreive it by default.
4. Get Container Name
To find the "Container Name" you need to visit "Storage browser" > "Blob containers" > + Add Container or copy the name from the list

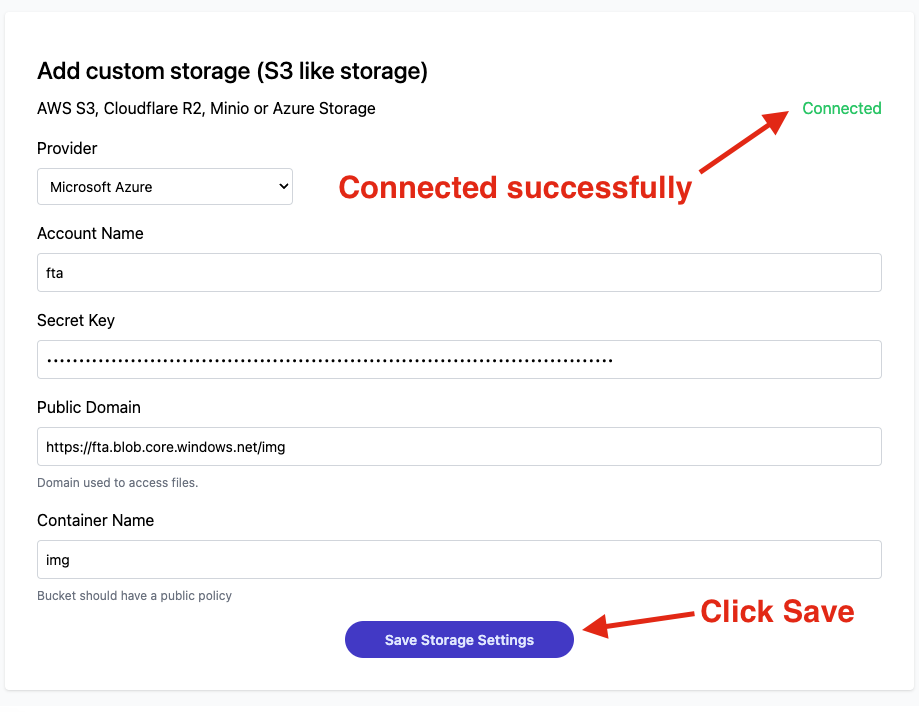
5. Save and check Storage Integration
Once you finish setting up the necessary fields on your Whitelabel Storage. click on "Save Storage Settings" to check if storage has successfully connected.
That's it, now you should have all necessary details to connect your Azure Storage to your Whitelabel space.
NEXT
© 2025. All rights reserved.