Audio Player
Audio Player Widget
Welcome to the “Audio Player” documentation.
Looking to integrate audio player into your website? Our widget empowers you to seamlessly integrate audio content into your web pages.
In this guide, we'll show you how to use the editor to customize your audio player widget.
Step 1: Open the Editor
1. Go to Audio Player template.
2. Click on "Edit" after choosing your template.

Step 2: Customize the content
- In this panel, you can Add, Duplicate or Delete a Track.

Step 2.1: Add Tracks
- To add a new track click on the "Add Track" button in the "Content Section", then a new Track section will be displayed.

- In the "New Track Section", we have two choices to add a track:

Note:
- Before clicking on the "Submit Button", make sure you are connected to your Fouita account.
- Playlist or Broadcast links are not supported, we support only audio or video links.
- Supported URLs with same examples:
- Now, click on the "Submit Button".
- A few moments later, after the download process is done, the track information (Title, Artist and Image Cover) will appear. The supported sources are: Spotify, YouTube, YouTube Music, Soundcloud, and Bandcamp.
- We can update this information simply by updating the link.

Step 2.2: Duplicate a Track
- To duplicate a track, choose one and click on its "Duplicate Button".

Step 2.3: Delete a Track
- To delete a track, choose one and click on its "Delete Button".

Step 3: Configure settings
Here, you'll handle the settings:
1. Begin by selecting your preferred audio player preview settings and then defining the default values.

2. You can activate the Wave Progress Bar (option to show the wave player instead of a simple progress bar).

When you activate the Wave Progress Bar, a "Wave Height Option" is displayed to give you the possibility to change the height of the wave, and you can change the wave and the progress colors from the "Colors Option".

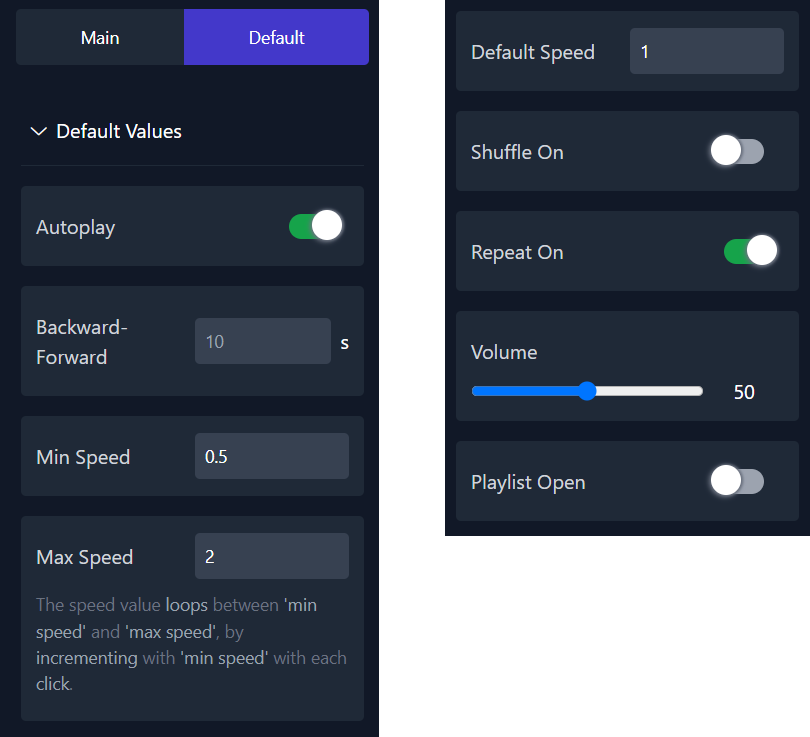
3. You can enable autoplay, adjust the minimum and maximum speed, customize backward and forward settings, set a default speed, activate shuffle and repeat modes, control the volume, and open the playlist by clicking the button..
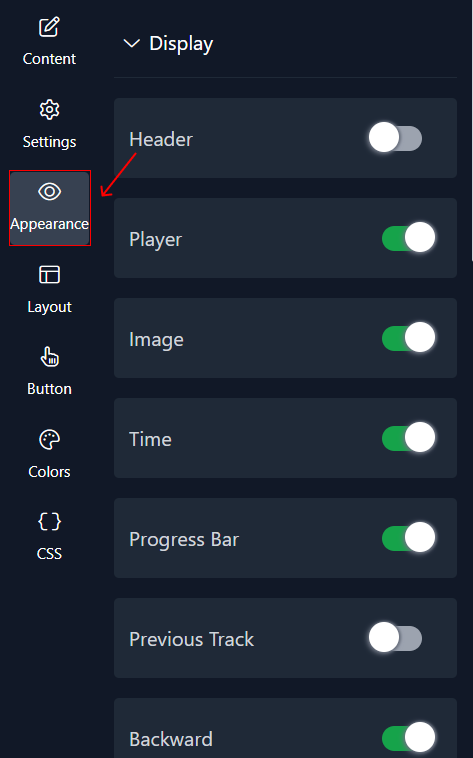
Step 4: Adjust the Appearance
Customize the appearance of your audio player widget by selecting which options you want to display.
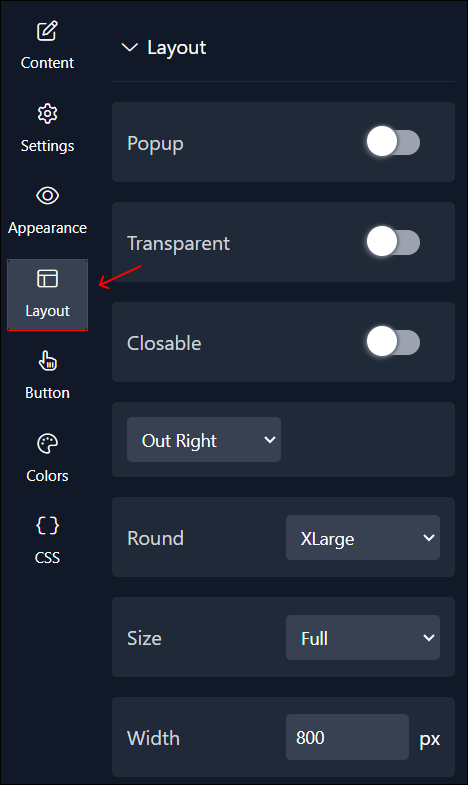
Step 5: Adjust the Layout
In the Layout panel, you can adjust how your audio looks and behaves. You have control over things like size, rounding, width, popup position, adding an overlay, choosing how it's displayed, and even adding animations.
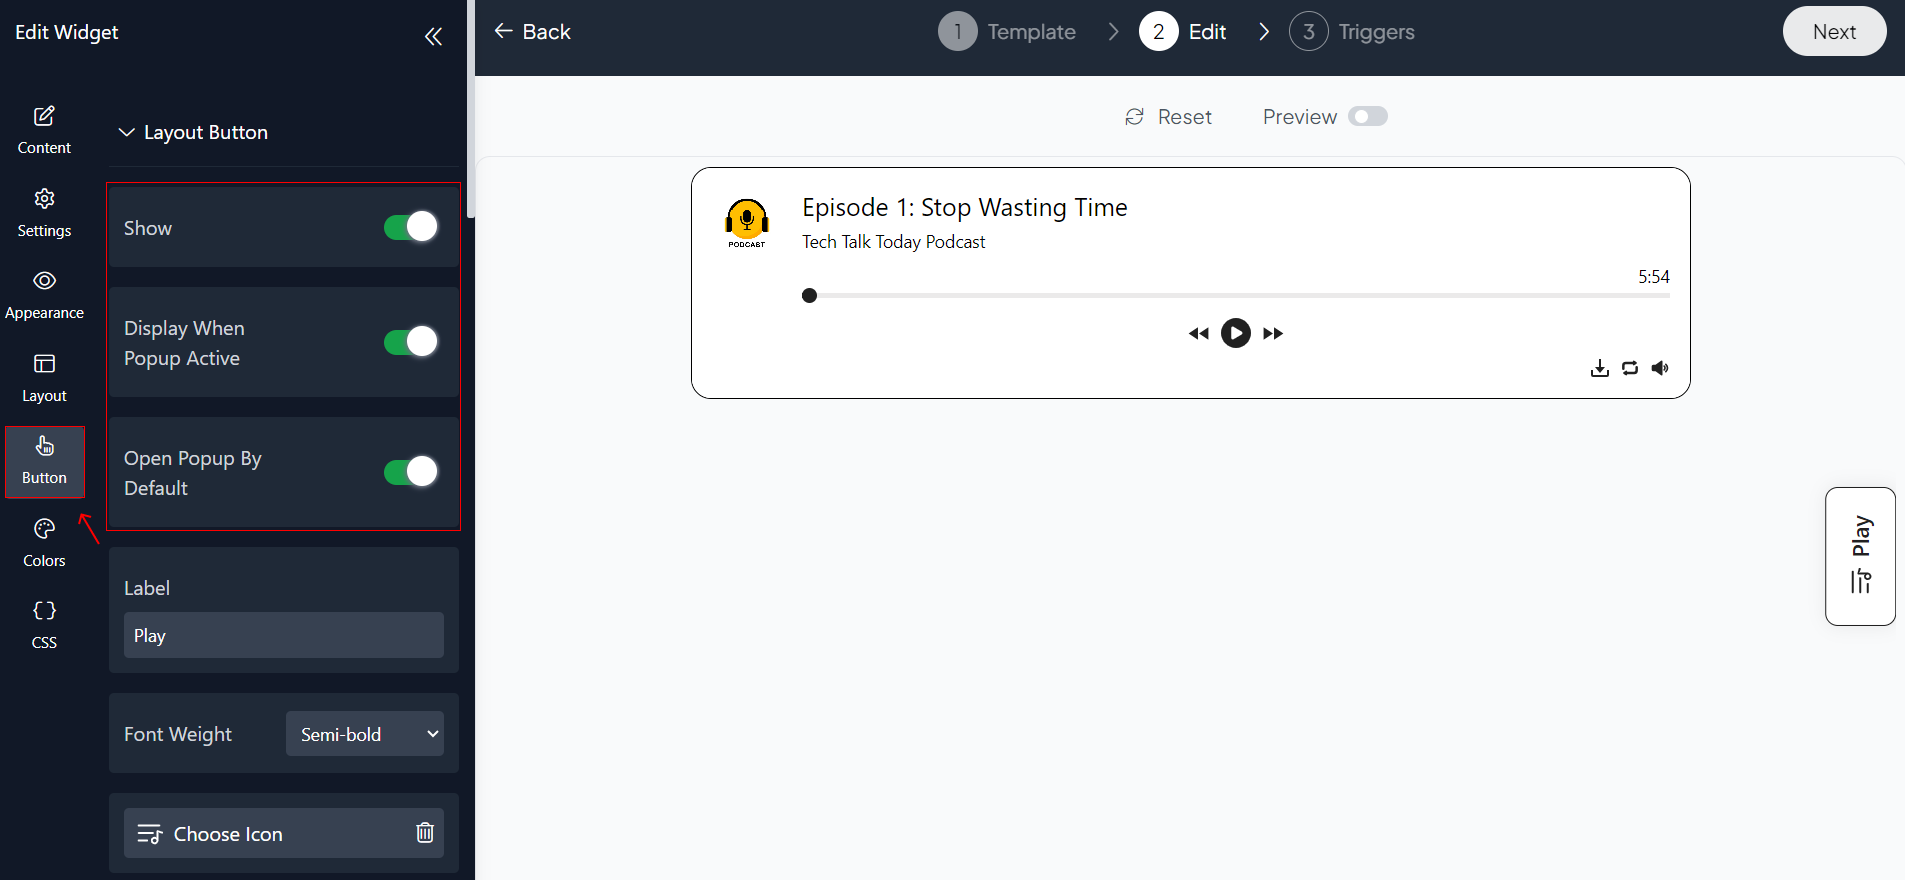
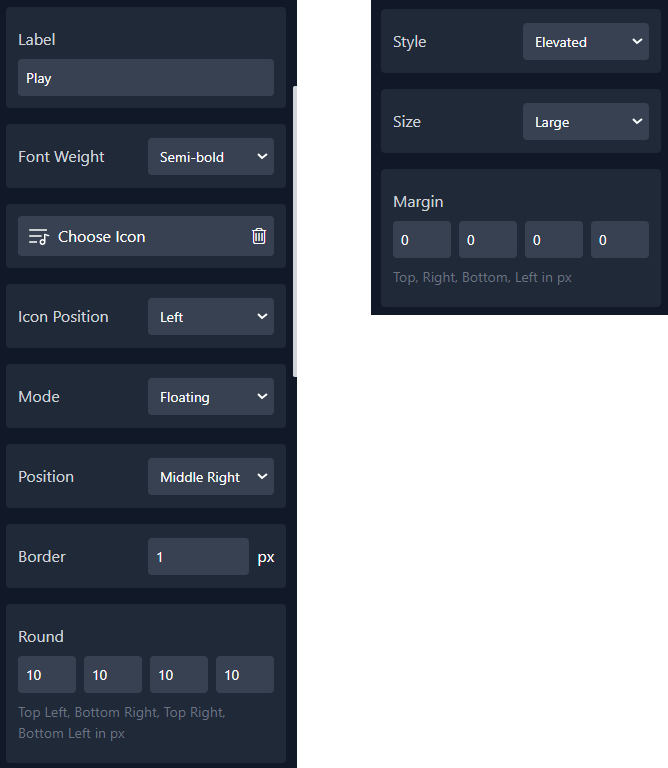
Step 6 : Adjust The Button


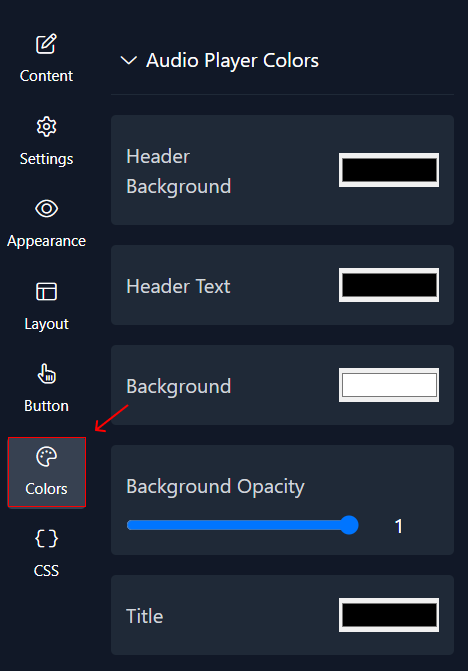
Step 7 : Choose Colors
Finally, you can select colors that match your website's design.
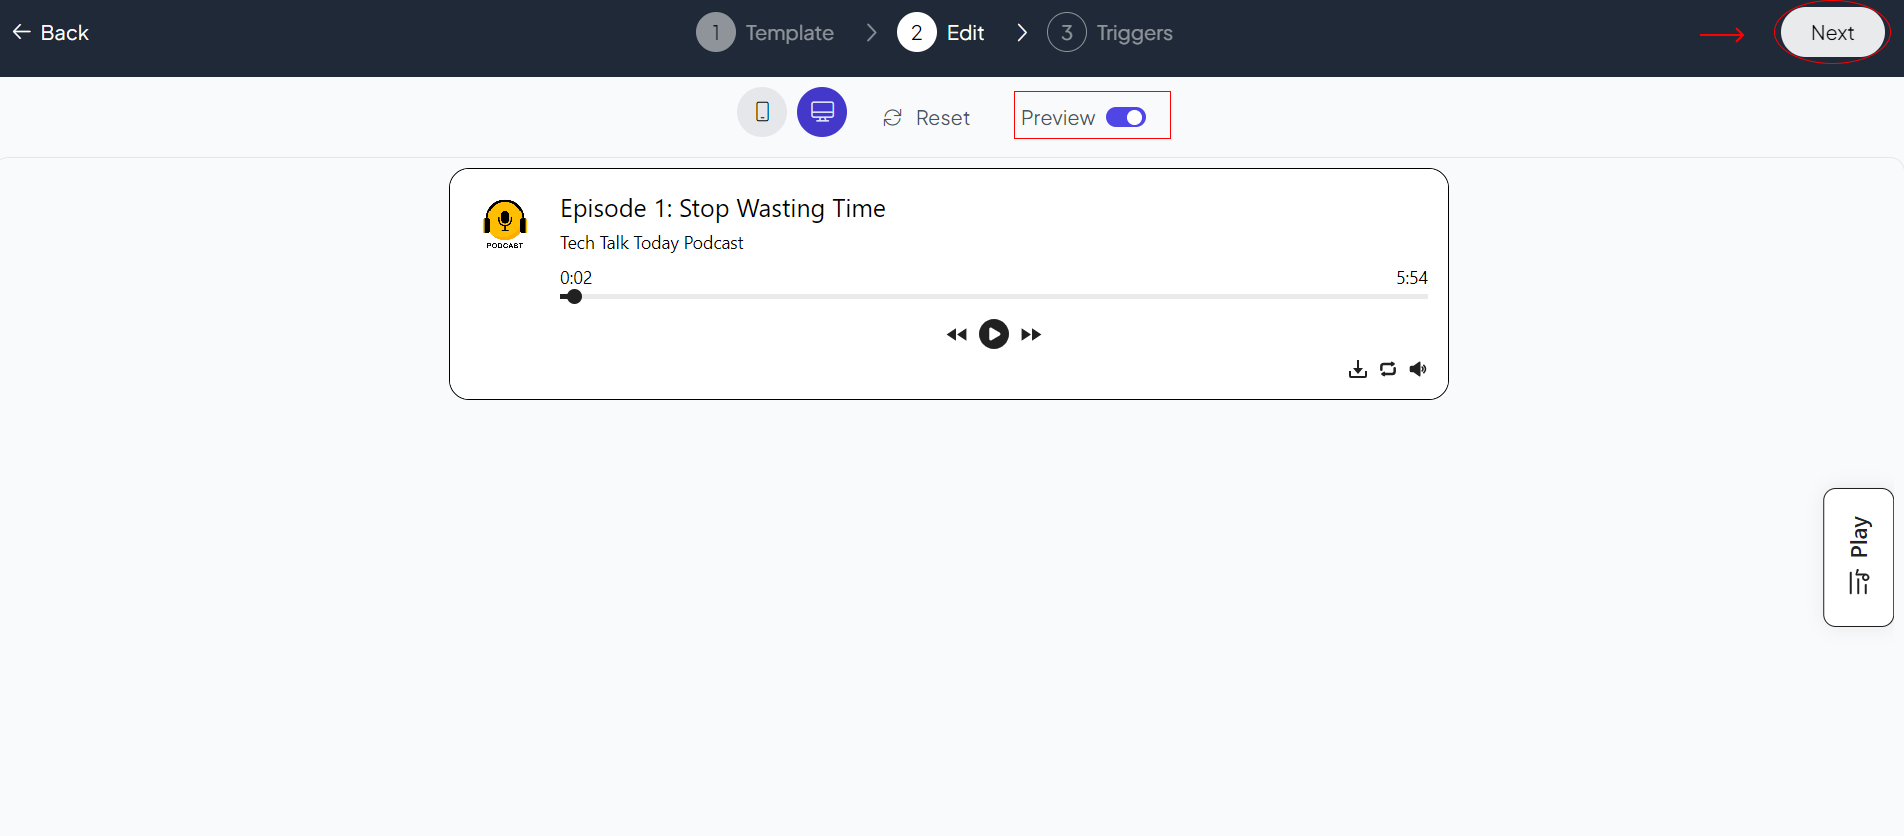
Step 8 : Preview
Lastly, you can click on “Preview” to see how your audio player widget looks on both desktop and mobile devices. After this, you can proceed to the next step.
Related Articles:
widgets
social feed
social
all in one reviews
wheel of fortune
editable reviews
restaurant menu
notification feed
youtube gallery
instagram feed
Enquiry Form
popup shop
countdown
image slider
Cookies
Buttons
Rss feed
More widgets
integrations
webhook
hubspot
mailchimp
convertkit
slack
sendgrid
More Integrations
installations
shopify
wordpress
squarespace
webflow
duda
jimdo
More Installations
built using fouita!