Features
Nav Steps
Welcome to the “Nav Steps” documentation.
Looking to integrate a feature section into your website? Our widget allow you to showcase your products, services, or content in a captivating way.
In this guide, we'll show you how to use the editor to customize your features widget.
Step 1 : Open the Editor
2. Click on "Edit" after choosing your template.
Step 2: Add and customize Steps
1. In this panel, you can easily add, remove, or rearrange steps as needed.
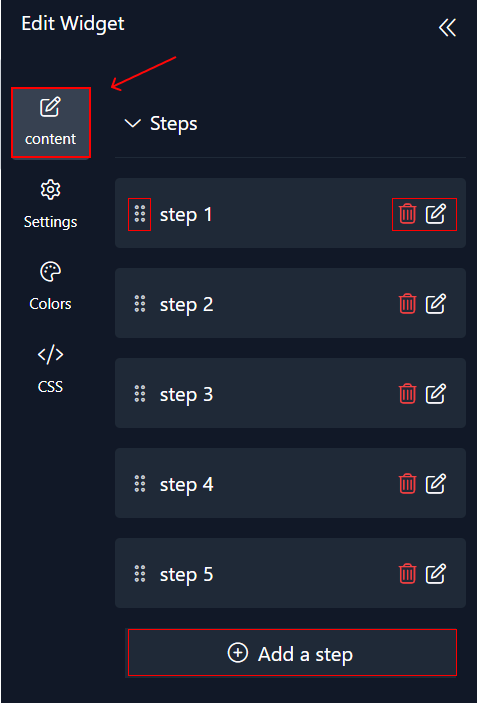
2. Customize each step by adding step identifier ,adding the page link ,adding media and selecting its type (icon, custom image, or none).
3. Modify step titles to align seamlessly with your website's content.
Step 3: Configure settings
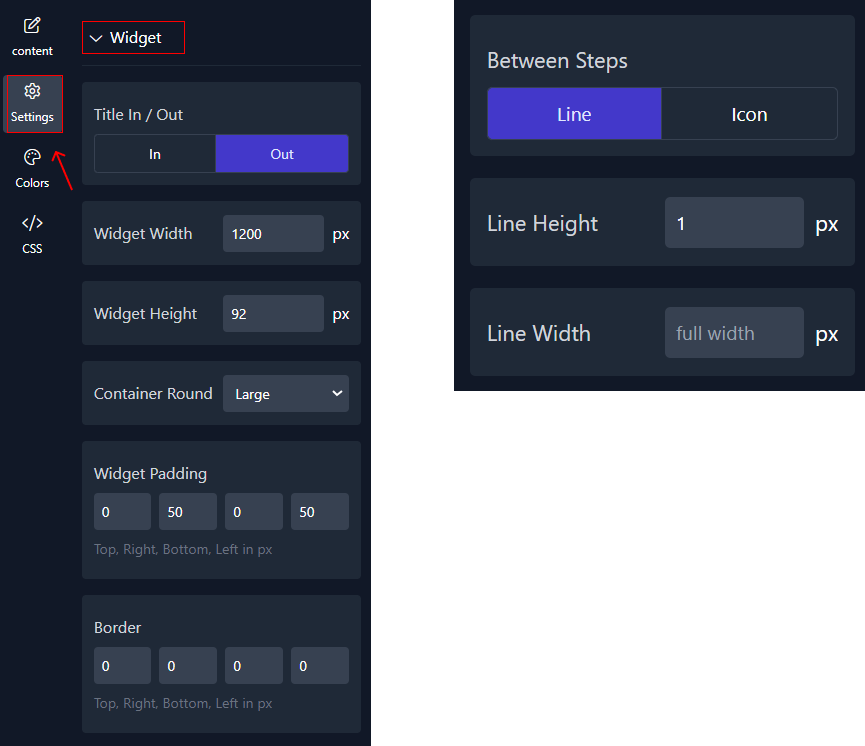
Here, you'll handle the steps settings:
1. In the "Widget" section, you have the flexibility to determine whether you prefer to display the title inside or outside the widget. Additionally, you can fine-tune various aspects such as width, height, container rounding, and customize padding to manage the space around it and the border. Moreover, you have the option to select between spacing a line or inserting an icon, with the ability to specify their respective width and height
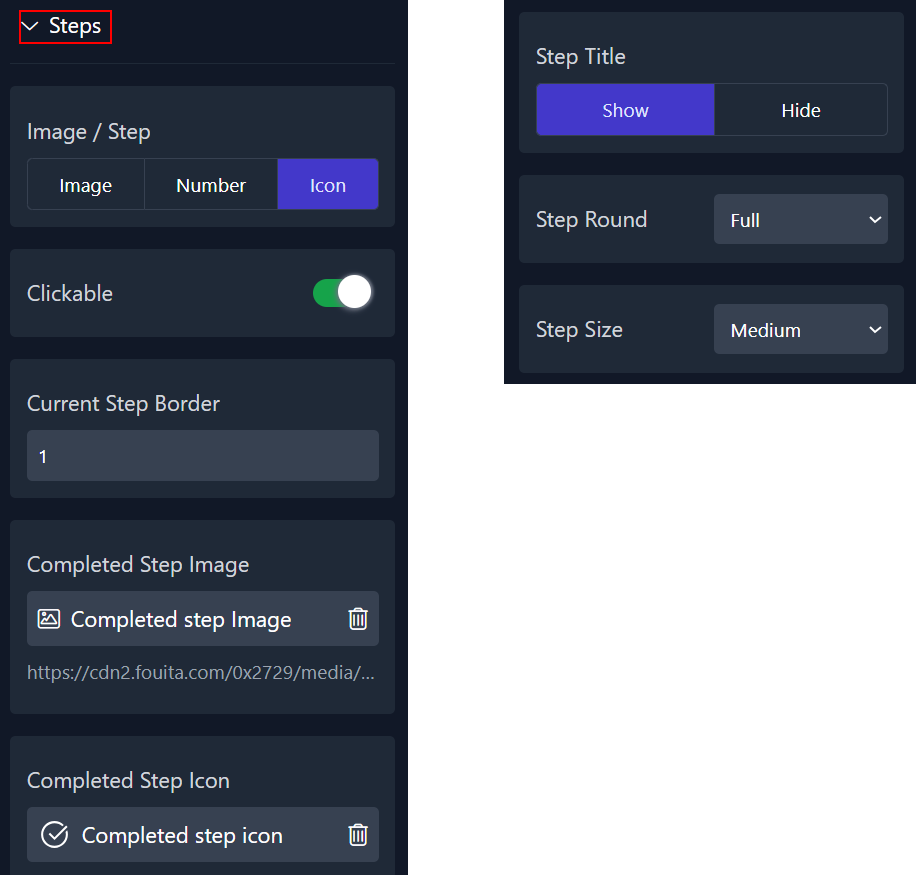
2. Customize Steps' appearance by choosing how they're represented whether it's through an image, number, or icon . You have the flexibility to determine whether each step is clickable, adjust the border of the current step, and define the completed step's image or icon. Additionally, you can opt to hide or display the step title and adjust the roundness and size of the step as needed.
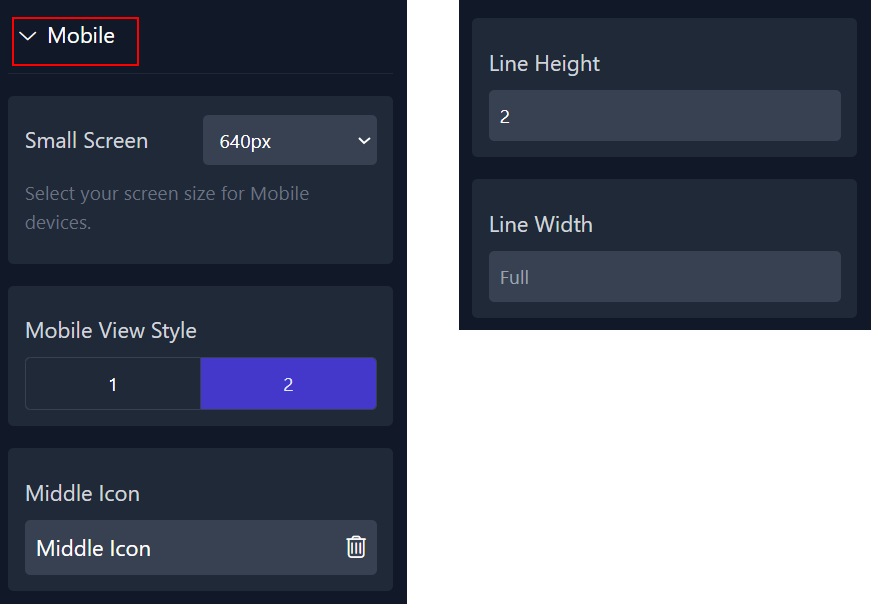
3.You can also manage the steps in the mobile version. Customize your screen size for mobile devices, adjust the mobile view style, line height, and width to your preference.
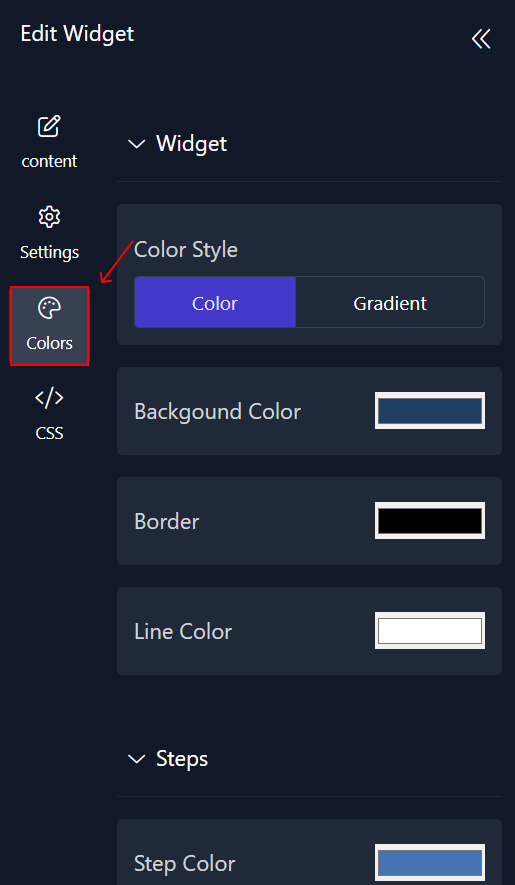
Step 4: Choose Colors
1. Within this panel, you can select colors that match your website's design.
Step 5: Preview
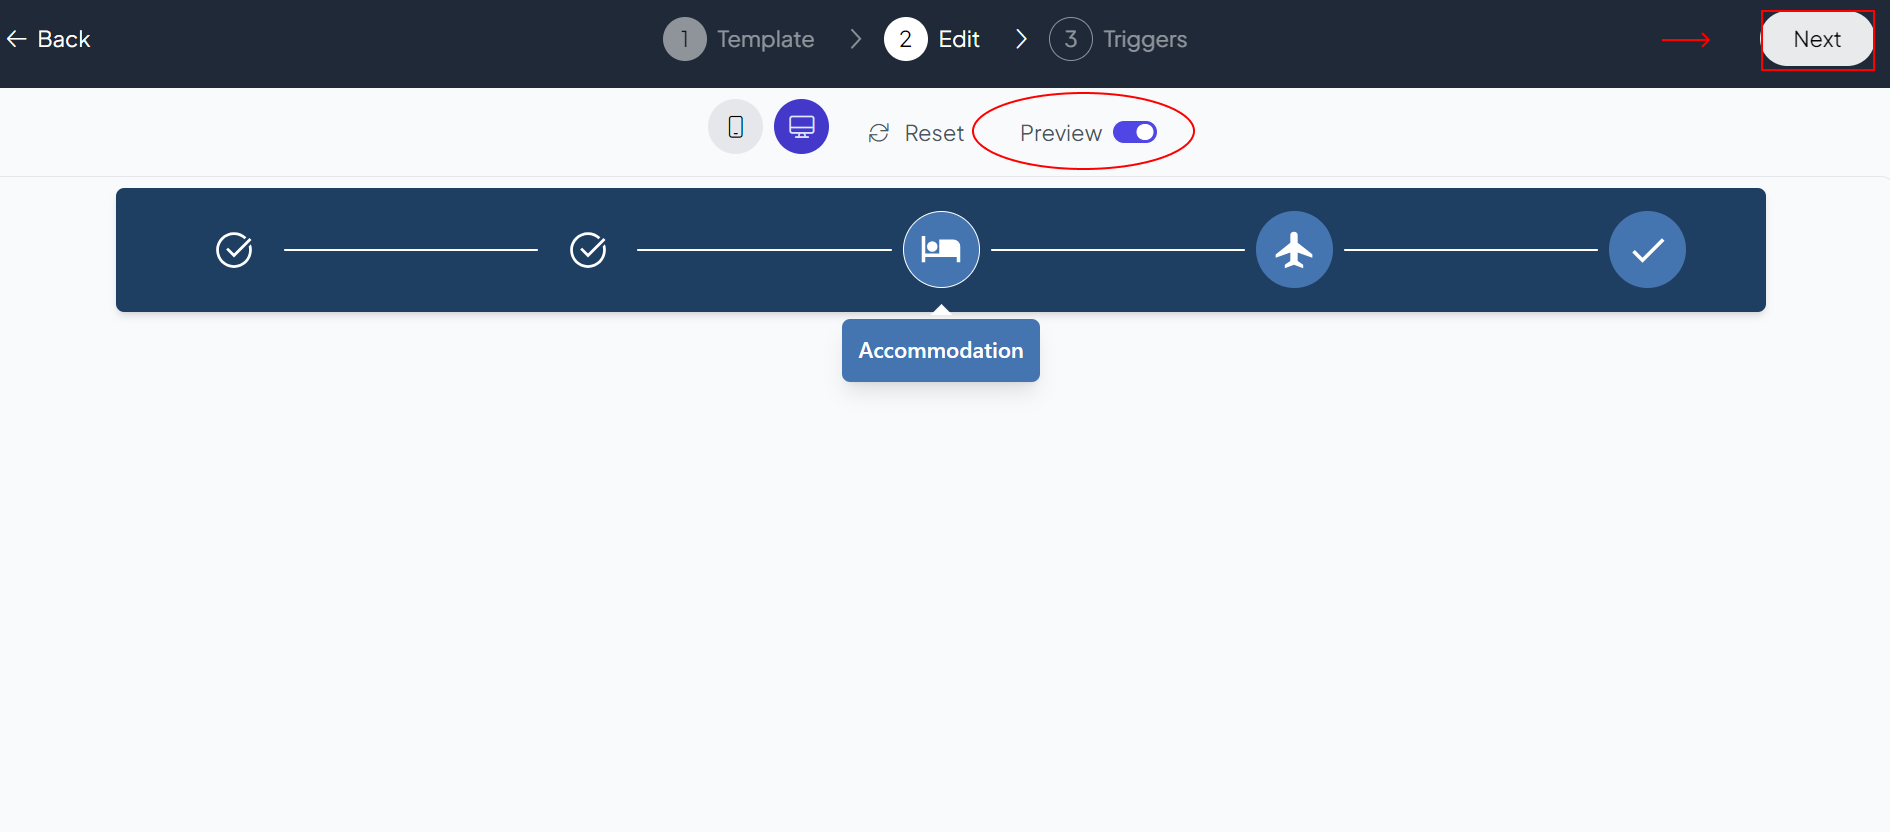
Lastly, you can click on “Preview” to see how your Step widget looks on both desktop and mobile devices. After this, you can proceed to the next step.
Related Articles:
widgets
social feed
social
all in one reviews
wheel of fortune
editable reviews
restaurant menu
notification feed
youtube gallery
instagram feed
Enquiry Form
popup shop
countdown
image slider
Cookies
Buttons
Rss feed
More widgets
integrations
webhook
hubspot
mailchimp
convertkit
slack
sendgrid
More Integrations
installations
shopify
wordpress
squarespace
webflow
duda
jimdo
More Installations
built using fouita!
