Booking
Booking
Welcome to the “Booking” widget documentation.
Looking to integrate a booking widget into your website? Our widget simplifies the process of collecting user data and enhancing access to your services.
In this guide, we'll show you how to use the editor to customize your booking widget.
Step 1 : Open the Editor
1. Go to Booking template.
2. Click on "Edit" after choosing your template .

Step 2 : Edit Booking slots
1. Enter your weekdays time slots, you can add morning and evening slots and even more if needed. Click on the "+" to add "from" and "To" times.

Example Template:

2. Customize your availabilities by adding a custom date time slots, could be a holiday or a day off too just leave the times "From" and "To" empty.

3. Add some booking details such as "Buffer time between meetings/appointments" and "Group amout allowed to book the same date-time"

4. Limit your scheduling dates by adding a "Date Range", or by modifying the Min and Max notices.

Step 3 : Edit form and second page
To open the second page you can click on "Form" panel or just pick a date and time from the first page.
1. Update the header that contains a "back" button and an editable title.

2. To customize the form's content, simply click the "Edit Form" button. For more details check Registration form documentation.

Check more settings under "Form" such as recaptcha site key, rounding and other props

3. Set the "Selected date-time" preview details such as "Border width", "Round level" ...

Step 4 : Adjust the Layout
1. Control your Layout's size, rounding, width, choosing how it's displayed, and even adding animations. To switch from the section view to the popup view, just activate the popup and the closable toggle. After that, you can select its position on the page.

You can also add an overlay if the popup is centered.

2. To display a "Toggle Button" activate the "show" switcher in the "toggle button panel" and adjust the button position, size, border, rounding, colors and theme.


Step 5 : Edit Widget Content
1. Update "Default Settings".


2. Update "Calendar Settings".


Step 6 : Customize Style and Colors
Starting with the main colors for the layout and the widget theme, then moving to the Calendar colors and background tranparency, finishing with the form colors.

Step 7 : Integrate Google Calendar
For a better and more efficient experience you can connect to your Google Calendar and pick a calendar of your choice to align your booking schedule with available calendar events. Submitted bookings will be automatically saved to your linked calendar.
To connect click on "Integration" label then click "Connect to Google Calendar" then choose a "calendar" to proceed with your connection. You can Disconnect at any time.

Step 8 : Preview
Lastly, you can click on “Preview” to see how your Booking Widget looks on both desktop and mobile devices. After this, you can proceed to the next step.
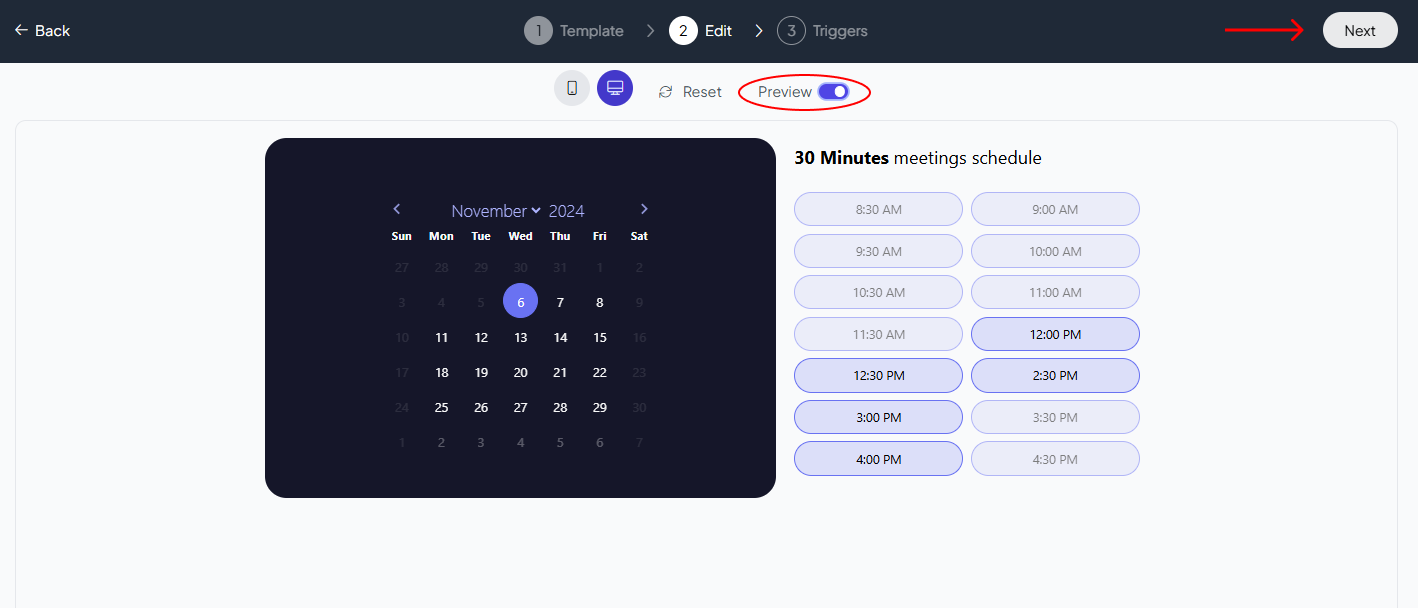
For further information on configuring triggers, please navigate to the Widget Triggers section.
Related Articles:
widgets
social feed
social
all in one reviews
wheel of fortune
editable reviews
restaurant menu
notification feed
youtube gallery
instagram feed
Enquiry Form
popup shop
countdown
image slider
Cookies
Buttons
Rss feed
More widgets
integrations
webhook
hubspot
mailchimp
convertkit
slack
sendgrid
More Integrations
installations
shopify
wordpress
squarespace
webflow
duda
jimdo
More Installations
built using fouita!