Restaurant Menu
Restaurant Menu
Welcome to the “Restaurant Menu” documentation.
Looking to integrate a Restaurant Menu into your website? Our widget enables you to create a visually appealing and informative restaurant menu that will captivate your audience.
In this guide, we'll show you how to use the editor to customize your Restaurant Menu widget.
Step 1 : Open the Editor
1. Go to Restaurant Menu templates.
2. Click on "Edit" after choosing your template.
Step 2: customize the content
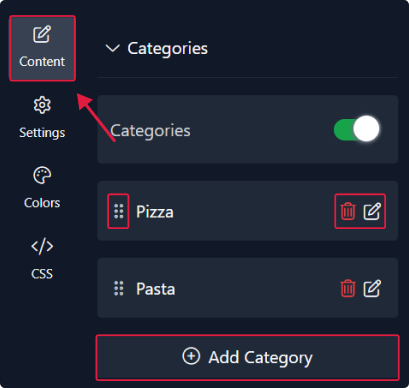
1. In this panel, you can add, remove, or rearrange categories as you wish after activating it.
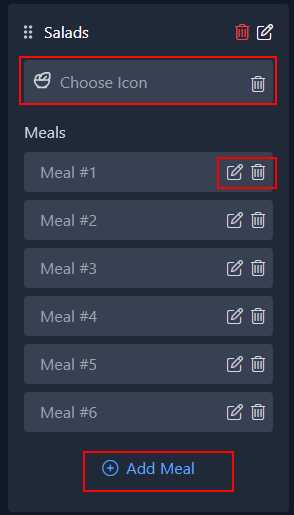
2. For each category, you can choose to add an icon, and also add, remove, or rearrange meals within this category.
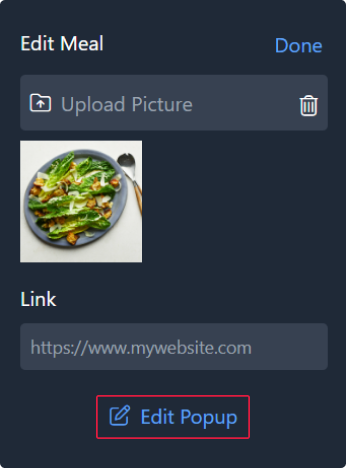
3. Customize each meal by uploading its picture. You can also insert a link and edit the popup if desired. Once completed, click "Done".
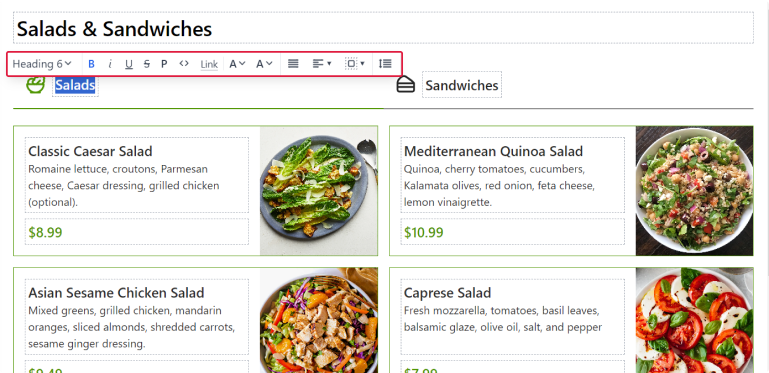
4. Lastly, edit the header, category name, and meal content using our text editor.
Step 3: Configure settings
Here, you'll handle the counters settings:
1. In the "View" section, you can choose whether to display the header, and also adjust the width and padding of the widget.
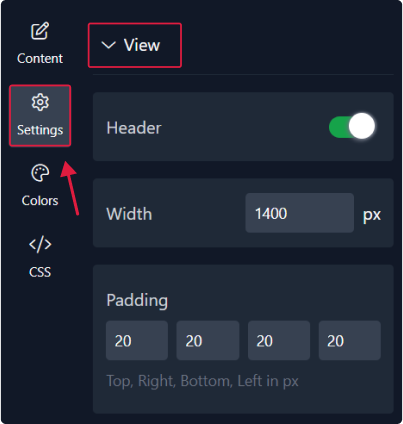
2. Opt for the layout style of categories, whether it's displayed as tabs or in a grid format. Fine-tune the alignment of content and adjust the position and width of icons
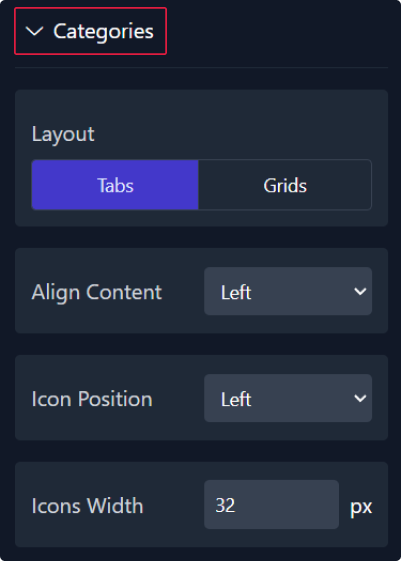
3. Customize meal styles by specifying their maximum grid and the gap between them. Choose how they are displayed, adjust the roundness and border, and select the click action.
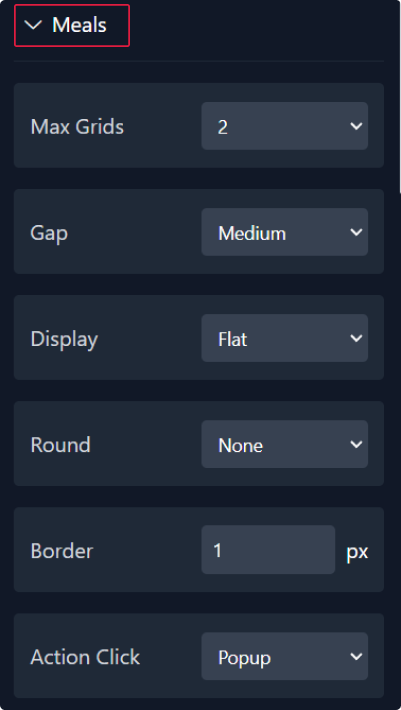
4. You can also choose to show the image, select your preferred theme, and adjust its position, width, height, and roundness.
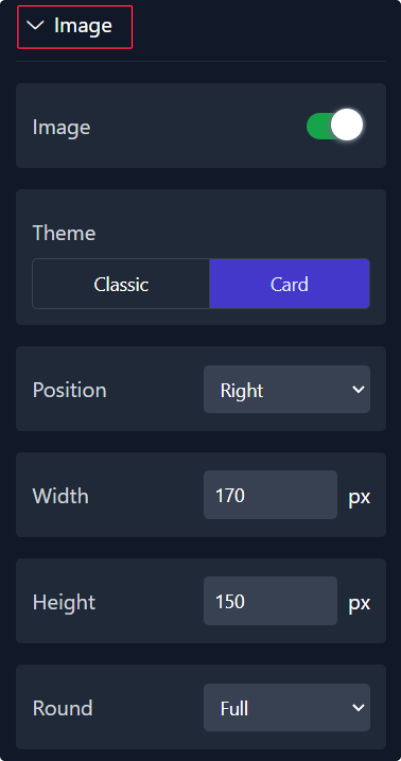
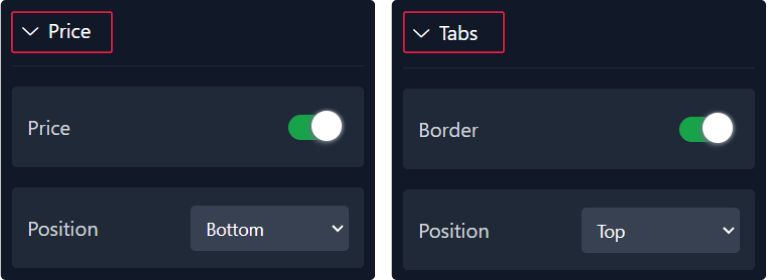
5. Moving to the price section, you can choose to display it and select its position. For the tabs, you can choose to show the border and select the tabs' position.
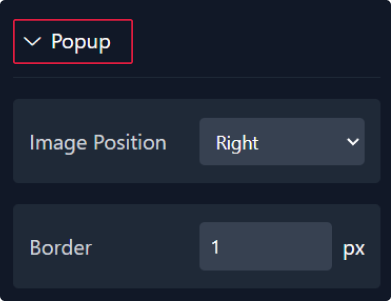
6. Finally, customize the popup by selecting the image position and adjusting the border.
Step 4: Choose Colors
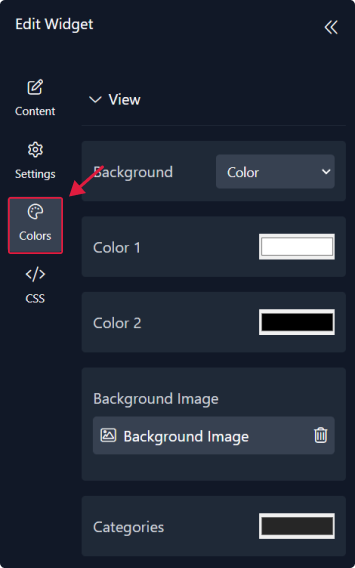
1. Within this panel, you can select colors that match your website's design.
Step 5: Preview
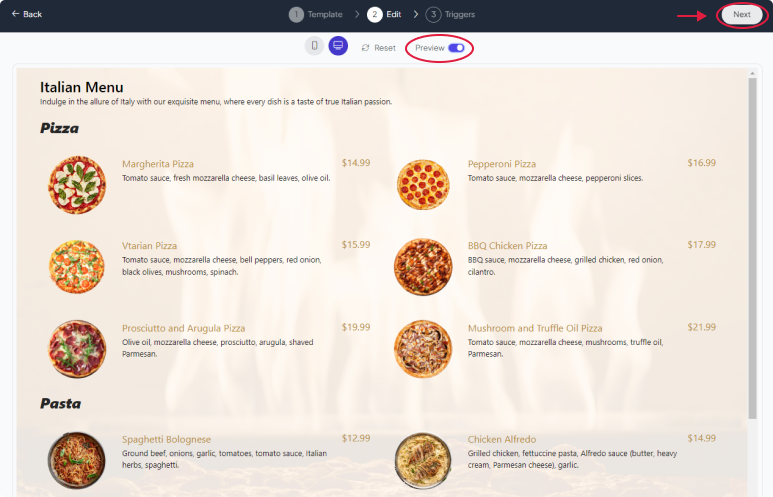
Lastly, you can click on “Preview” to see how your Restaurant Menu widget looks on both desktop and mobile devices. After this, you can proceed to the next step.
Related Articles:
widgets
social feed
social
all in one reviews
wheel of fortune
editable reviews
restaurant menu
notification feed
youtube gallery
instagram feed
Enquiry Form
popup shop
countdown
image slider
Cookies
Buttons
Rss feed
More widgets
integrations
webhook
hubspot
mailchimp
convertkit
slack
sendgrid
More Integrations
installations
shopify
wordpress
squarespace
webflow
duda
jimdo
More Installations
built using fouita!
