Inetgrations
System.io Integration
Welcome to the documentation of Systeme.io integration !
By the end of this page, you should have your integration successfully done. The steps are easy to follow and of course, if you face any problem, you can reach out for help.
API Key
- Open your System account
- Click on your profile picture, then on Settings.
- Then scroll down to Public API keys.
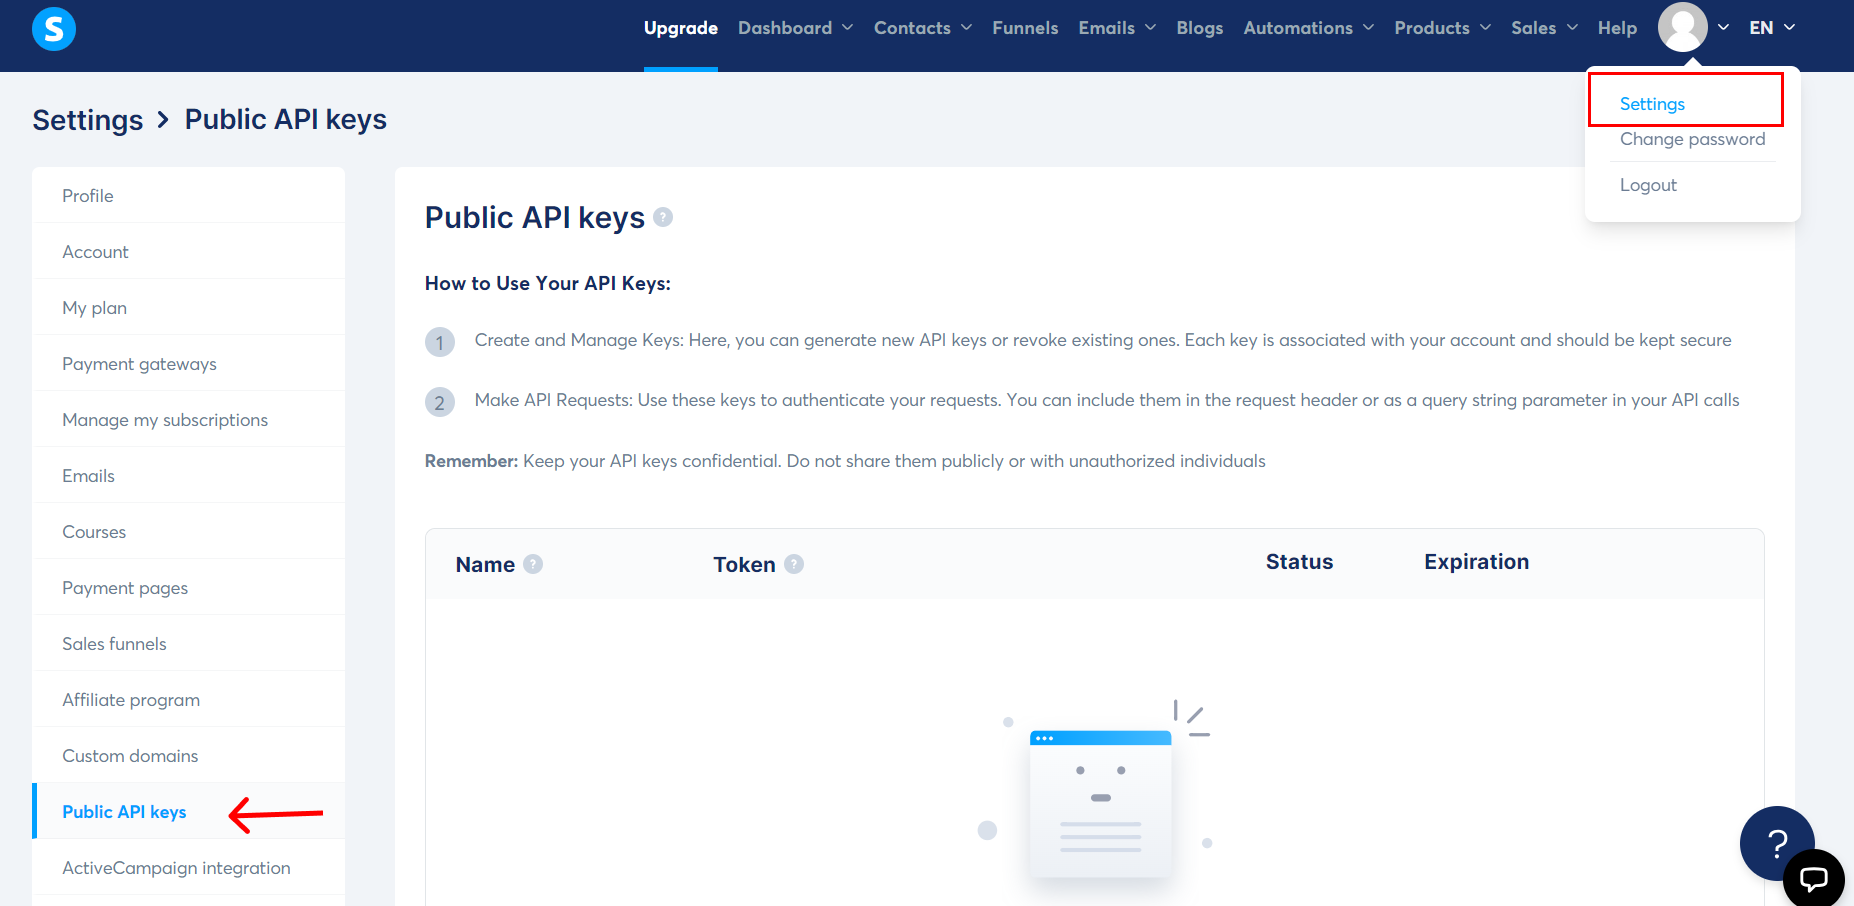
- Click on Create to start creating a public API key .
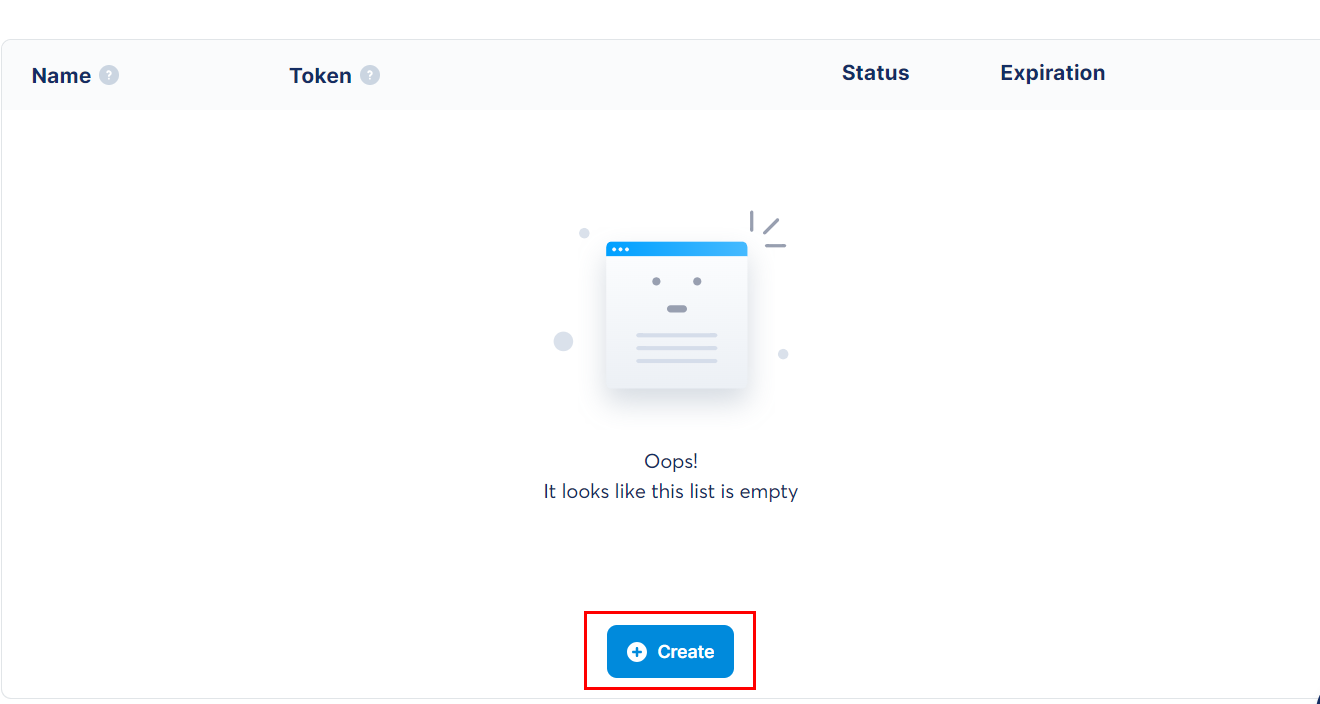
- On the Create public api key popup that appears, choose a name, and select an expiration date and time for your API key.
- Note: To have your API key remain active indefinitely, leave the Expiration field empty.
-After providing this information, click on Save.

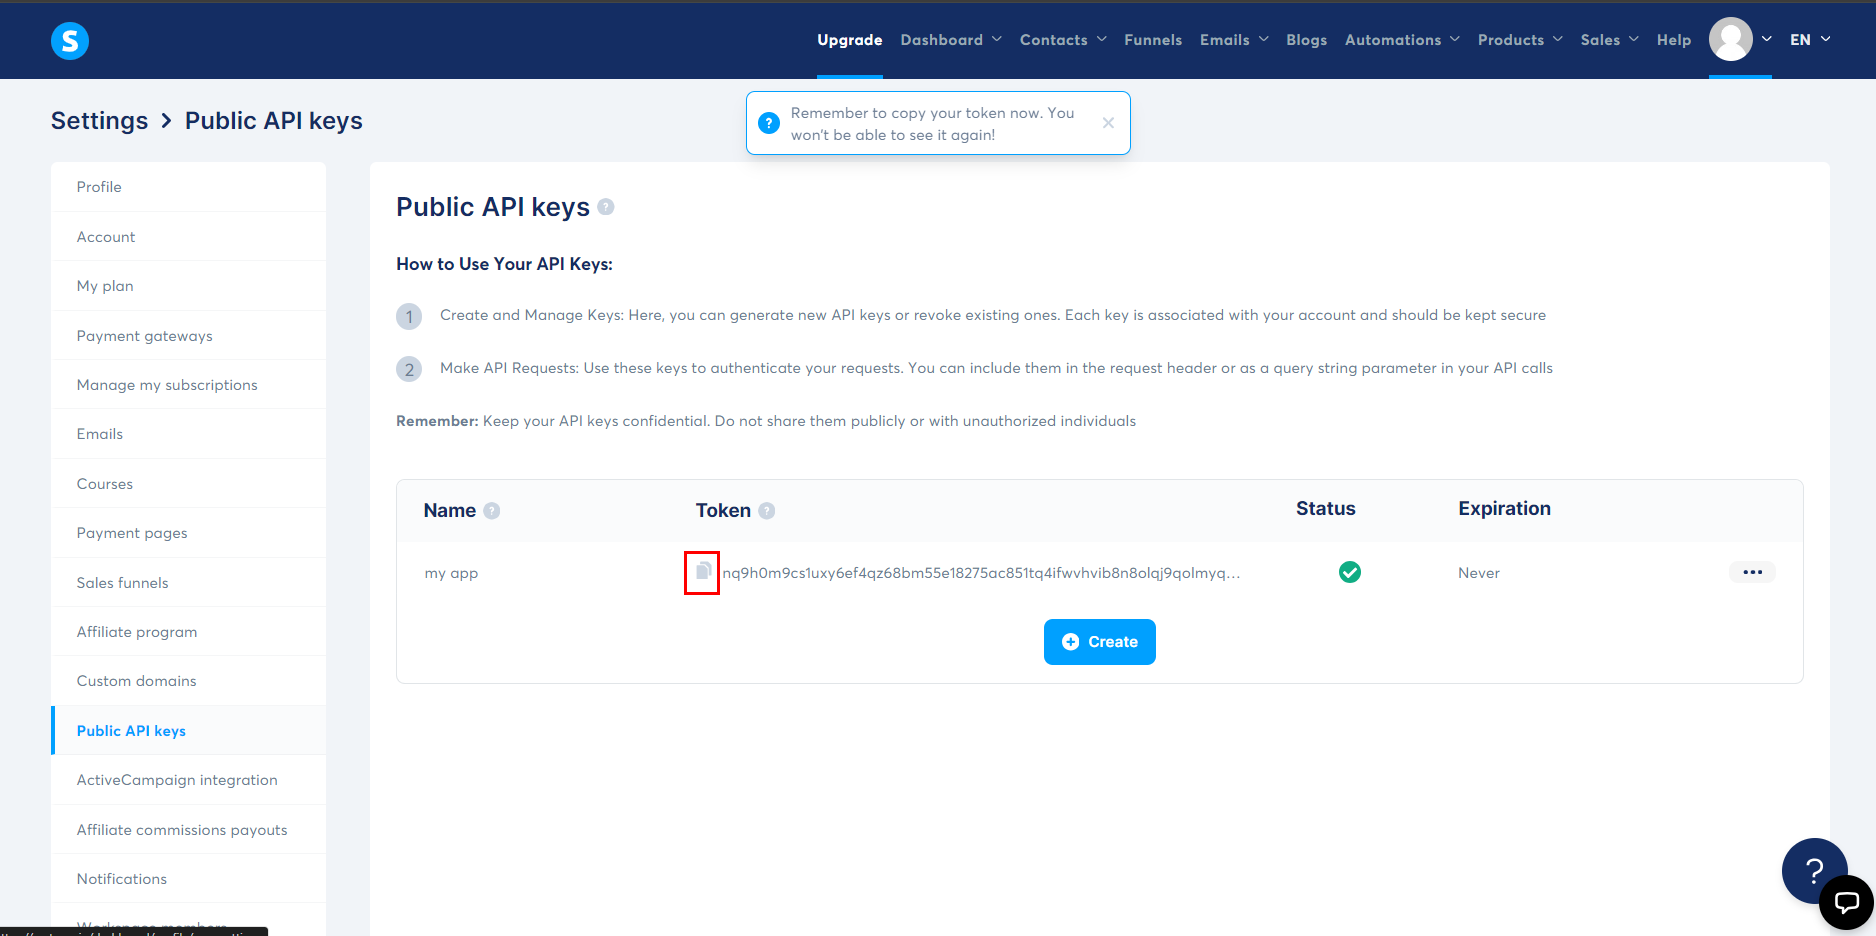
- After creating your API key, copy your token immediately, as it will not be accessible afterward. To copy your token, click on the copy icon, located to the left of the token.
Setup your Fouita widget
After creating your form based widget on fouita, go to the widget details page by clicking on the widget name on your dashboard, the click on the "Integration" tab.
- Go to System integration and click on edit .
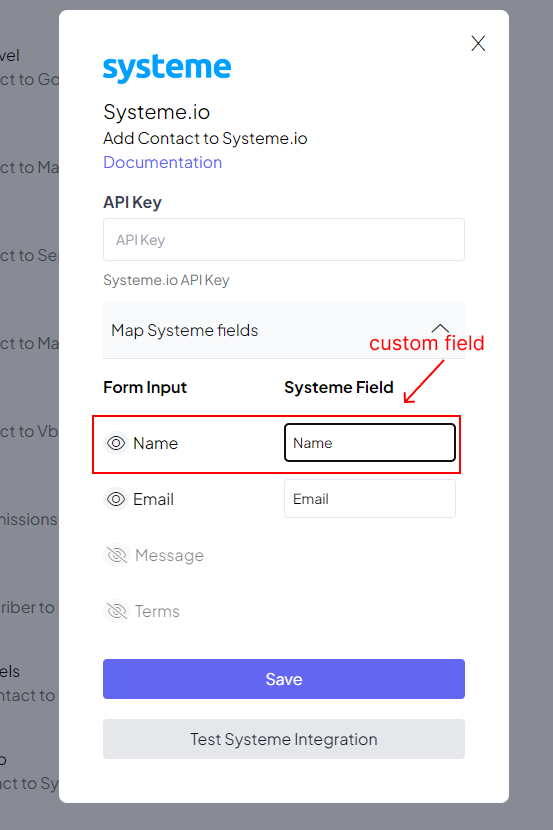
Click Test System Integration to debug the results and make sure it's working. Then click Save.
System.io only accept email attribute ,to add an attribute, you typically need to create a custom field and define its name:
- Go to your system dashboard, click on the Contacts tab then click on the Create Contact button.
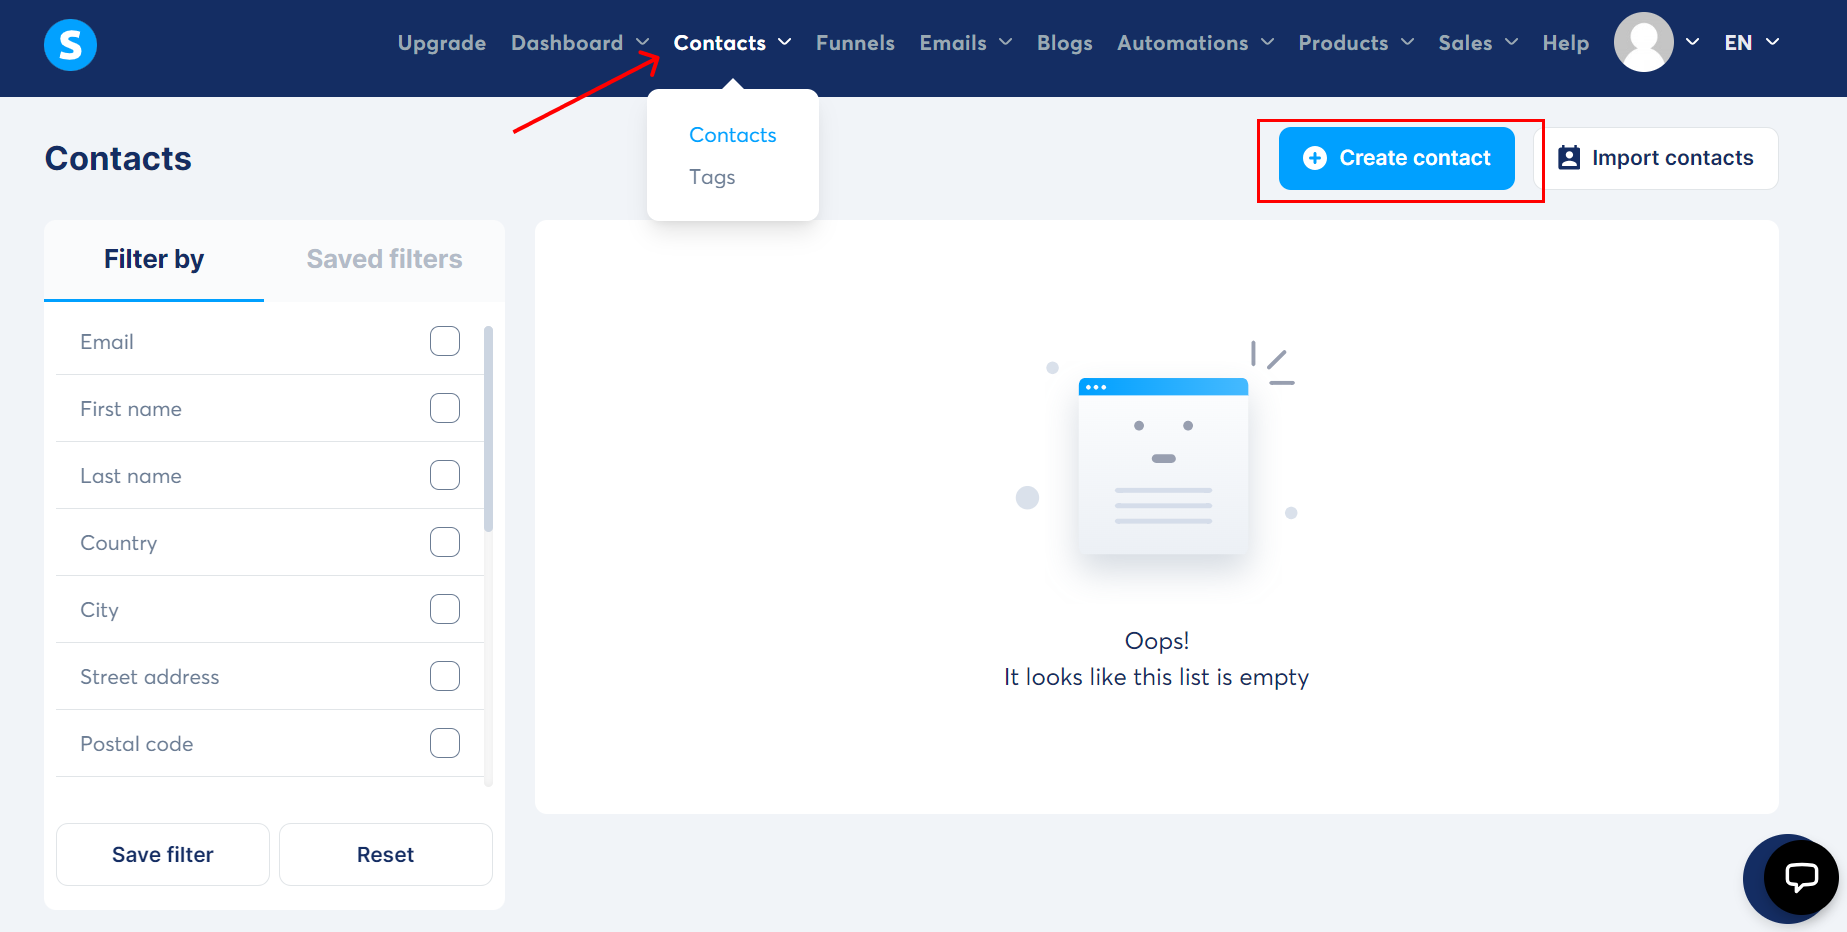
- Then click on Add new custom field button.

- Now add your field name then click Save.
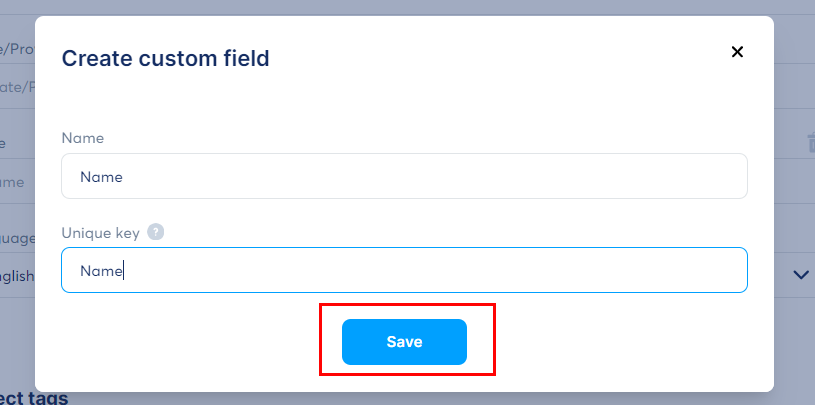
That's it, the widget will automatically send the contact information to your account.
widgets
social feed
social
all in one reviews
wheel of fortune
editable reviews
restaurant menu
notification feed
youtube gallery
instagram feed
Enquiry Form
popup shop
countdown
image slider
Cookies
Buttons
Rss feed
More widgets
integrations
webhook
hubspot
mailchimp
convertkit
slack
sendgrid
More Integrations
installations
shopify
wordpress
squarespace
webflow
duda
jimdo
More Installations
built using fouita!


